
 By
By 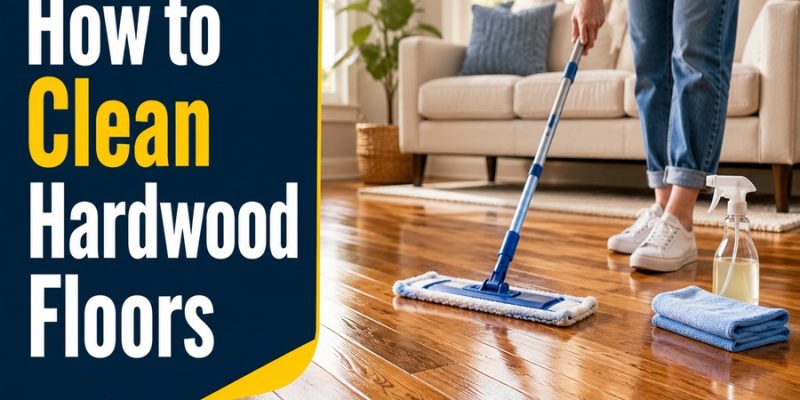
Most hardwood floors don’t wear out. They get cleaned out — by the wrong mop, the wrong spray, or one too many buckets of water. Wood is a living, porous material, and the finish sitting on top of it is thin. Treat both with a little respect and a good floor can outlast the house.
This guide walks you through it in the order that actually matters: figure out what you’re standing on, then clean it the way that finish wants to be cleaned.
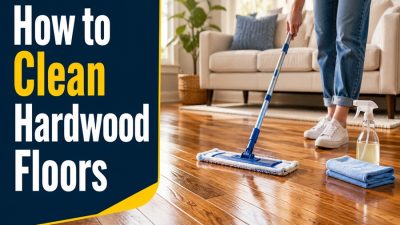
To clean hardwood floors, dust or vacuum first (brush roll off), then mop with a well-wrung microfiber pad and a pH-neutral wood floor cleaner — never a dripping mop. Skip vinegar, steam, oil soaps, and anything labeled “polish” or “shine.” Wipe spills immediately. Mop weekly in busy areas, monthly elsewhere.
Step 1: Identify Your Finish Before You Touch It
This is the step nearly everyone skips — and it’s the one that decides everything else. The cleaning method depends on the finish, not the type of wood underneath.
The 60-Second Water Drop Test
Pick a spot with normal foot traffic, away from a board seam. Place a few drops of water and wait about a minute.
- Water beads up on the surface → your floor is sealed (usually polyurethane or a similar film finish). This is the durable, low-maintenance kind. Water-based cleaners are fine.
- Water soaks in and darkens the wood → your floor is unsealed, oiled, or worn through. These need gentle, near-dry care and should generally never be cleaned with water.
Test near a baseboard or inside a closet if you’re nervous about marks. Older floors and high-traffic paths sometimes lose their seal in patches, so results can vary spot to spot — that’s useful information, not a mistake.
The Smudge Test (Backup Method)
Rub a finger firmly across the floor. No smudge means it’s surface-sealed. A smudge means it’s a penetrating oil, wax, shellac, or varnish finish — treat it gently, like the unsealed group.
Finish Types at a Glance
| Finish type | How it behaves | How to clean it |
|---|---|---|
| Surface-sealed (polyurethane) | Water beads, smooth sheen | Sweep, then damp-mop with pH-neutral cleaner |
| Oil / penetrating seal | Water absorbs, matte look | Near-dry microfiber, oil-safe products only |
| Wax finish | Steel wool shows grey film | Buff to shine, never wet-mop |
| Lacquer / shellac / varnish | Less moisture-resistant | Treat like oiled floors — minimal water |
| Unsealed / raw | Absorbs fast, feels rough | Dry methods only; consider sealing |
Step 2: Build the Right Routine (Daily, Weekly, Seasonal)
Consistency beats intensity. A floor cleaned little and often lasts far longer than one that’s neglected then scrubbed hard.
Every Day (or As Needed): Dust
The single biggest enemy of a hardwood floor is grit. Microscopic sand and dirt act like sandpaper under every footstep, grinding fine scratches into the finish over time.
- Use a microfiber dust mop or a soft-bristle broom. A pre-treated microfiber pad grabs dust instead of scattering it.
- Avoid stiff brooms — those bristles scratch.
Once a Week: Vacuum
- Switch your vacuum to its hard-floor setting. This lifts the machine and shuts off the beater bar, cleaning by suction alone.
- A spinning brush roll scratches wood, so confirm it’s off.
- Be cautious with robot vacuums that have hard wheels or rotating brushes — they can scuff the finish.
Weekly to Monthly: Damp-Mop
- Reserve mopping for busy areas weekly; low-traffic rooms need it monthly or even seasonally.
- Mop along the wood grain, then let the floor air-dry fully before walking on it.
Seasonal: Manage Humidity
Wood expands and contracts with the air around it. Aim to keep indoor humidity roughly between 35% and 55%. Too dry and boards shrink, opening gaps; too humid and they swell and may buckle.
Step 3: Mop the Right Way (Damp, Never Wet)
Here’s the rule that saves the most floors: your mop should be damp to the touch, never dripping. If you can see standing water, you’ve used too much.
The routine:
- Dust or vacuum first — mopping over grit just drags it across the finish.
- Wring the microfiber pad until it’s barely moist.
- Apply a small amount of pH-neutral hardwood cleaner (or plain water for sealed floors).
- Mop with the grain in overlapping passes.
- Let it dry completely. No walking, no rugs down, until it’s dry.
Water is hardwood’s real enemy. Excess moisture seeps into seams and edges, causing warping, cupping, swelling, and eventually squeaks. On oiled floors especially, a spill left sitting can darken the wood from the inside.
What to Never Use on Hardwood Floors
Some of the most popular “cleaning hacks” quietly destroy wood finishes. Here’s the avoid list, and why each one earns its spot.
- Vinegar. It’s acidic. Over time it eats away at the protective finish and leaves floors dull and cloudy. The natural-cleaner reputation doesn’t apply here.
- Steam mops. Heat and moisture open the wood’s pores and damage the finish — often irreversibly. Even eco-friendly steam is a hard no for real wood.
- Oil soaps. They leave a residue that dulls the shine, attracts dirt, and can interfere with any future refinishing.
- Anything labeled “polish” or “shine.” These add a layer on top of your floor rather than protecting it — and that build-up clouds the surface.
- Traditional string mops. They trap dirt, push it around, and dump too much water. Microfiber lifts dirt instead of spreading it.
- Abrasive tools — steel wool, stiff brooms, eraser-type sponges. Scrub sponges strip the finish along with the stain. Steel scratches.
- Excess water, from any source. The most common mistake and the most damaging.
How to Fix Common Hardwood Problems
Dull or Cloudy Floors
Usually residue — from the wrong cleaner, too much cleaner, or a “shine” product building up. Switch to a pH-neutral wood cleaner used sparingly. Regular light cleaning restores clarity and lets the wood’s natural glow come back through.
Sticky Spots and Spills
Certain substances actively eat the finish: milk, mustard, and pet urine are common culprits. Wipe them immediately with a barely-damp cloth, then dry the spot with a clean towel. Never let them sit.
Scuff Marks
Rub the mark with a plain tennis ball. It lifts scuffs without scratching the finish — no chemicals needed.
Candle Wax, Gum, or Crayon
Harden it first. Press an ice cube (in a bag) over the spot until brittle, then lift it off carefully with a plastic spatula. Gentle pressure only, so you don’t strip the finish underneath.
Paint Splatter
A cloth with warm water and a drop of dish soap loosens most fresh splatters. Follow with a mild pH-neutral cleaner so no soap film is left behind.
A Prevention Checklist That Does More Than Any Cleaner
The best cleaning is the dirt that never reaches the floor.
- Adopt a no-shoes rule. Removing shoes — especially heels and cleats — is the single most effective way to cut floor damage. Shoes track in the grit that scratches.
- Use felt pads under furniture. And replace them yearly; old pads trap grit and become tiny sanders.
- Place mats at every entry. Catch the sand and moisture before it spreads.
- Wipe spills on sight, not “later.”
- Trim pet nails. They dig fine scratches over time.
The Detail Most Guides Leave Out
Two things almost never make it into the standard “how to clean hardwood” article.
First: a sealed floor isn’t sealed at the seams. Even on a prefinished polyurethane floor, the gaps between boards are often unprotected. That’s exactly where a too-wet mop does its damage — water wicks down into the seam and warps boards from the edge inward. So the water-drop test near a seam can mislead you, and a “sealed” floor still deserves a near-dry mop. The bead test tells you about the board face, not the vulnerable joint.
Second: “clean” and “shiny” are not the same job. A lot of dullness gets misdiagnosed as dirt, so people clean harder and make it worse. If your floor is clean but still flat-looking, the finish itself is worn — that calls for a finish refresh or eventual refinishing, not another mop. Chasing shine with more product only adds cloudy build-up. Knowing which problem you actually have saves both the floor and the effort.
Neither point shows up in most top-ranking cleaning guides — and both are where good-intentioned cleaning quietly goes wrong.
Frequently Asked Questions
Can I use vinegar to clean hardwood floors?
No. Vinegar is acidic and slowly eats away at the protective finish, leaving floors dull and cloudy. Use a pH-neutral cleaner made specifically for wood instead. The “natural cleaner” reputation of vinegar doesn’t carry over to sealed wood.
Is a steam mop safe for hardwood?
No. Steam forces heat and moisture into the wood, opening its pores and damaging the finish, often permanently. This holds true even for sealed floors and eco-friendly steam machines. Stick to a damp microfiber mop.
How often should I mop hardwood floors?
Mop high-traffic areas about once a week and low-traffic rooms monthly or even seasonally. Dust daily or as needed, and vacuum weekly with the brush roll off. Over-mopping does more harm than under-mopping because of the moisture involved.
How do I know if my hardwood floor is sealed or unsealed?
Do the water drop test: place a few drops of water on the floor and wait a minute. If it beads, the floor is sealed. If it soaks in and darkens the wood, it’s unsealed, oiled, or worn — and should be cleaned with near-dry methods, not water.
What’s the best cleaner for hardwood floors?
A pH-neutral cleaner formulated for wood. Applied sparingly with a damp microfiber pad, it lifts dirt without leaving residue or stripping the finish. For sealed floors, plain water on a well-wrung mop also works for light cleaning.
Why do my hardwood floors look dull after cleaning?
Usually residue build-up from the wrong product, too much cleaner, or a “polish/shine” formula. Switch to a pH-neutral wood cleaner used in small amounts. If the floor is clean but still flat, the finish itself is worn and needs refreshing, not more cleaning.
How do I remove scuff marks from wood floors?
Rub the mark with a plain tennis ball. It removes scuffs without scratching or stripping the finish, and needs no chemicals.





Comments